

By sphsengineering www.sphsengineering.com/ Follow

 The Boss Box Bot" width="" />

Do you enjoy building? Do you like huge projectile machine? If this sounds like you, we have a project to satisfy all your cravings. Trebuchets will make any day of the week so much better. In this Instructable we will teach you how to build one of these amazing machines.
We are in a high school engineering program and we propose to build the best trebuchet with a pivot point under four feet the world has already seen. We will work on this project for about a month. We will build, test, evaluate, refine and continue to make it better.
The trebuchet dates back to the middle ages where they were used as a siege weapon. On average these machines could fling material of 350 pounds onto an enemy territory. Unlike now, the humans pulled ropes instead of having a counter weight. Today they are used mostly for recreation and education.
*These tools are not essential to build a trebuchet, but the end product will be better.
When using machinery make sure to always wear safety goggles. When building, make sure to have assistance from someone if needed, do not try to strain yourself. This project is a trebuchet, we do not want any missing limbs at the end of the process.
We used a baseball as our projectile because we thought it would work the best.
When we were first assigned this project we had to go through so many options and learn about so many new mechanics. It was a very intense time, since we had so little of it. From the beginning we had wanted to build a trebuchet, so that was the primary objective here. We compared the abilities and mechanics of trebuchets to catapults at first, and we were convinced trebuchets were the way to go. Then the delving began, after much research, we finally found the information we needed to have the perfect trebuchet. (It will be given references, before we turn it in.)
Then we took into account the limitations the rules gave us and pushed everything to the limit. With a pivot height of 48" to the dot, we then put together an 8' arm with the pivot point placed in the spot we felt was the best after some math. The frame was built around that, we gave the length 2 6' 2x4's and the width 2 28" 2x4's. With the brace's height's only limitation was our mitre saw's angle of 50º, we put brackets in the corners and we had a trebuchet frame.
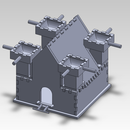
For our design we used SolidWorks to build it virtually. After that we used both SolidWorks and a Virtual Trebuchet Simulator to test.
Our SolidWorks Parts:
The first part of the trebuchet we are putting together is going to be the frame. The lumber we will be using is two 28" inch 2x4's, two 5' 2x4's, two 50" 2x4's, and four 58" 2x4's. For hardware we used 2" wood screws. We will also use plywood as support trusses. Don't forget to drill 1' 1/8'' holes on the 50'' pieces of 2x4's. Remember to use a speed-square to keep everything lined up correctly.
The frame serves to keep everything in place and should need little to no maintenance after construction (we had to do a lot of maintenance.) Since the frame will also take on most of the strain, you want it to be solid. This means no shortcuts when fixing planks to one another. When starting on this project, you want to make sure all of your cuts are straight and correct, your corners should be squared off, and minimize mistakes.
The arm is one of the most important parts of the trebuchet. To make sure ours is perfect we measured twice, cut once, and made sure to be perfect.
To get perfectly aligned holes we used the drill press. We made some of the holes exactly the same size as the bar then sanded them a little to reduce friction on the pivot point of the arm and the bar.
For the next piece of the trebuchet, we will be adding 2 x 20" 2x4's. These pieces are simple to prep, only five holes to drill.
Place pipe through the holes.
Trusses:
We added support trusses where the support beams meet the 50'' bars to add even more support. We highly recommend this structural support.
Sling:
For the sling we used a canvas bag material. We also recommend using 550 paracord since it has the best fitting characteristics to our project. We also found adding grommets to the holes where our rope was tied to the sling, since the force tends to tear through it rather easily. We based our sling from http://teamurbansiege.com/designing-trebuchets/tr. but then made a few modifications to make it better.
Guide Chute:
With the chute, we diverted from the original blueprints due to time constraints and were happy with the end result as it allowed our arm to have more clearance on the wights we added, which in turn gave us more flexibility on our trebuhcet.
Quick Release:
Mount 2 Eye Hooks to the center of the frame where the arm falls. Mount the last Eye Hook on the arm between the two you added to the frame.
Release Pin:
The pin's angle is an essential piece to your trebuchet. We used a rectangle pin because it only has two points of contact.
Frame Braces:
Where we saw wood splitting, we handmade braces out of metal to release some of the stress.
To make it look cool, we painted ours camouflage with different colored spray paint.
Our first test with a sling went over 70 feet!
On our second test we maxed our weights out. Our ball flew over 200 feet but then our trebuchet broke under stress. RIP Trebuchet.
This forced us to improve our design and better it, since we do plan on beating out the competition.
We came in 4th over all and we are extremely proud of what we have done! Our best launch was a baseball 240 feet with 140 pounds of weights.